
As 2021 statistics show, Apple continues to strengthen its position on the mobile device market, with a particular dominance over the US region. iPhone user count has now passed the one billion mark, and their average screen time is more than two hours every day. Most of those minutes are not spent on the original purposes of phones, which are making calls and sending SMS. Rather, they are dedicated to apps of all kinds – messengers, social media platforms, day planning, education, tools for work, fitness, and entertainment.
Making an app, therefore, is a promising opportunity for existing businesses to reach a wider audience, raise brand awareness, and gain a competitive advantage to stay relevant. An app can represent an additional monetization channel, a way of taking a more prominent position in the customers’ lives, or both. In this guide, we will go through the steps of building an iOS app, covering different development approaches and helpful techniques to design, test, and release it.
Why should you make an iPhone app for your business?
While debating on how to approach app making, you need to decide what kind of app you should focus on first: an Android one or an iOS one. Developing apps for two different platforms simultaneously can take too much effort and require a significantly larger budget. There are, of course, cross-platform options that allow you to make a universal app for both operating systems, but they won’t achieve the same stability and native feel as a dedicated platform app can.
Releasing the new app one platform at a time allows you to fine-tune its features, work out bugs, and gather user feedback. After all the intricacies are worked out, you can start making the app’s counterpart for the other store. As for the iOS vs. Android choice, there are several aspects where Apple has the upper hand. The first is their high standards for all apps distributed via the App Store. To adhere to them, the app has to present real value, work seamlessly, and have a user-friendly interface. The resulting user experience is something your customers will definitely appreciate.
Another sensitive issue that Apple addresses well is data security. As a business, you might have reservations about sharing internal information and private customer records on the web. iOS applications, again, strive to ensure enhanced data safety and have several protocols for secure storage and transmission. Lastly, iOS apps are naturally suited to work well on a large pool of Apple’s devices, like iPhone, iPad, Mac, etc., which makes for a wider reach and easier scalability.
A business iPhone app is closely associated with higher quality, better security, and a more credible image. One more thing to consider is whether your brand’s target audience matches that of iPhone users. According to Statista, Android still maintains a higher market share worldwide than iOS does. However, the situation can be different for your specific region: for example, more than half of all US citizens are iPhone users, while Android mostly gets its numbers from Asian countries. App Store also generates more consumer spending than Google Play, if that’s something that aligns with your app creation goals.
Step 1 – Define Why You Want to Build Your Own iPhone App
Before diving into the development process, you need to outline business areas where you feel like you could deliver a better-quality service or improve performance statistics. The chosen roadmap will help you define the necessary features and UI. This step is essential for setting the right direction for your coder and design teams that will work on bringing the app to life.
You can try looking at all of your current processes from a customer’s point of view. Do they lack transparency in what happens to their order? Do they wish to have more control over their appointments, purchases, or profiles? Would a mobile app bring them more convenience as opposed to using your website? Your app will offer real value to its users by solving a certain pain point that they have.
Alternatively, you can put your business goals first to determine areas for growth. Are your employees tired of doing the same routine work that can be automated with a mobile app? Are you trying to extend your reach or geographical coverage? Do you want to leverage the existing monetization strategies, like advertising or paywall subscriptions? Building an app can be a strategic move in your digital marketing and sales plans.
Consider the Features That Will Help Solve This Problem
Once you’ve identified the areas for improvement within your business, you can start putting together a feature set that the future app needs to have. We will look at some examples for several popular industries below, but some of the standard functionalities that most iOS apps will require are push notifications, in-app purchases, file uploaders, basic messaging, a pop-up menu with action options, and profile editing.
For a local restaurant or flower shop, apps can enable delivery and online order services. Ecommerce brands can extend their coverage from a web browser to an iPhone application to boost sales. If you run a business that deals with scheduling, like a private gym or a spa, you might want to lower the workload of your managers by sending automated reminders and letting clients create and cancel appointments on their own.
What Is Your Budget?
The budget you allocate to build an app can also act as a defining factor for the course of development. App making is a multi-stage process with a lot of unexpected costs: ongoing maitenence and back-end infrastructure, copywriting and design for the App Store listing, as well as the annual distribution fee. If you are starting on a moderate budget, you should reconsider adding complex features and strive for something simple.
The available funds can also influence your approach to development: you can either write the code yourself, hire an agency or a freelancer, or use ready-made templates provided within app builders. We will cover the price ranges and anticipated time-to-market of the three options in Step 5. For now, just keep your budget in mind to manage your expectations of possible app complexity.
Step 2 – Perform Competitor Research
Apps do not exist in a vacuum. The App Store is like any other platform: it places leading performers at the top of the charts and leaves their less successful competitors at the bottom. And even if you are creating a small niche app with no intention of it becoming widely popular, checking out similar applications by companies that are in the same business as you can be very useful. You can leverage their experience to determine dos and don’ts, monitor best practices, and watch out for things that put off potential users.
Try the Apps Yourself
To find competitor apps, try using the search bar with their brand names and/or main purposes in App Store, browse the corresponding category, or simply use Google. Download several apps and try to analyze what you like about them, what you think can be improved, and how easy and convenient they are in general. Look at how the app is structured, at the logic of its subsequent screens, and how engaging it is for everyday users. Make notes of any inconsistencies and notice inspirational ideas.
Check Customer Reviews
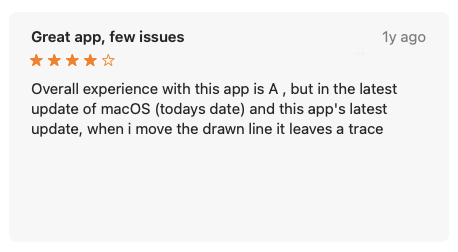
After trying the apps yourself, you will form your opinion about the existing offers in your category. To see whether you’re on the right track to figuring out the key factors that make those apps favorable, add more statistics to your research: check out App Store reviews. Look for things that people like and keep an eye out for complaints. Here’s an example of a review to learn from – it states both good and bad aspects of a popular photo editing app, with added suggestions for improvement:
Step 3 – Survey Potential Users of Mobile Apps
While your research can prove to be insightful, at the end of the day, it’s the user opinions that define the app’s success. Testing out the market and gathering preliminary customer feedback will allow you to adjust the app-making course and align its direction with the existing demands. Here are some things to keep in mind when putting together a survey:
1. Keep it simple.
Don’t add too many questions and keep the completion time under five minutes – otherwise, it will be hard to gather enough answers. Add pictures to choose from or provide options written in a simple, accessible language.
2. Have a clear goal in mind.
Are you wondering whether you should add a certain feature or not? Or do you want to find out whether an app is something that would be useful to your customers? Put together questions that can help alleviate your main uncertainty.
3. Add neutral and “Other” choices.
If none of the answers to a certain question fit, you could lose a user or collect unrepresentative feedback. Add “none of the above” or “not sure” options. For multiple-choice polls, consider adding a text field for alternative answers.
3. Select the right audience.
For a survey to be relevant for your app-building process, you will want to distribute it between your potential and existing customers, preferably the ones that own iOS products.
How to Create a Survey for Your iOS App
You can ask customers to complete the survey in person: when they are visiting your premises, picking up an order, or simply stopping by. Type in the questions in a Word document and print it out for them to fill in. However, with the pandemic limiting our face-to-face opportunities to connect, running a digital survey might be a more suitable option. Create a short landing page or a Google Form and share it via your newsletter or social media.

Step 4 – Plan Your App
Armed with the survey statistics, competitor research findings, and a preliminary list of selected features, you can move on to the planning stage of app building. Next on your to-do list are separating primary and secondary functionalities and creating a wireframe for your iPhone development and design teams.
If you don’t plan on hiring anyone to build an app, add more emphasis on the details, but don’t dig too deep – you still might shift or rework some things during the testings stages. For businesses that want to outsource the development part, approaching potential agencies with a clear understanding of what you want is also a smart strategic move. You will get a more adequate pricing quote and timeline estimation and can discuss features with more context.
Core vs Secondary Features
Figure out the core features essential to your iOS app to put together its MVP version. Making a beta release with a self-sustainable yet limited functionality will allow you to save time and budget and see how the app performs in real market conditions. You will want to put the main features first development- and design-wise. In the app’s navigable interface, make them easily accessible and more prominent.
Create a Wireframe for Your New App
A wireframe is a detailed digital sketch of the app that depicts all the interface elements, their relative positions, and the logic and flow of consequent user actions. Now’s the time to decide which features you will put on the first screen, where do all the buttons go, what fields and windows are needed, and how many different scenarios will be available to the users. Consider consulting with a UX designer at this point to make sure the app is user-friendly and intuitive.
Step 5 – Build Your App
As briefly mentioned above, there are three common approaches to developing an iOS app, ranging in the required effort, budget, and timeline. They each have their advantages and disadvantages, and can also be used together: for example, you can develop the back-end part of the app in-house and outsource a designer for the front-end, or use a no-code builder and approach a freelancer to add a few tweaks to make it more suitable for your business.
Use an App Builder
No-code builders are a simple and inexpensive way to create an app with a standard set of features and an uncomplicated concept. These services usually have a set of pre-made iOS code templates and adjustable design elements that you can mix and match to make out your desired look. This approach won’t work for complex apps and doesn’t allow for deep customization but is worth considering for small business owners with little-to-no coding experience.
Code the App Yourself
Brands that have in-house design and dev teams can create the front-end and back-end parts of the app themselves. A proven approach to IT project management is working in short sprints following the agile methodology. The planned work front is broken into small feature-related tasks that are completed and documented in the course of development.
For efficient coding, you will need to master Apple’s native object-oriented programming language, Swift, and their integrated development environment (IDE), Xcode. Working with the platform will require Intel Macintosh hardware (MacOS). You could technically try running OS X on a virtual machine, however, remember that it violates Apple’s End User License Agreement. You will also need to register a developer account with an annual $99 fee. Once the Xcode installation is complete, you can start coding in the so-called main window, which is the main document window for viewing and editing different parts of your Xcode projects.
Using the Xcode development platform, you can also design the app’s interface, which will be stored in the form of .xib files. Lay out all the interface elements in the project window builder and write the code that implements their behavior in the assistant editor. In addition to Xib documents, Apple introduces the concept of storyboarding. Use the iOS SDK with tools and compilers to get access to libraries, documentation, code samples, and guides.
Pay a Developer
Alternatively, you can hire a freelance developer or outsource the app building process to a dedicated agency. Freelancers have moderate per-hour rates, but can sometimes be unreliable and usually require more control and guidance. With an agency, you will get the product turn-key, with little involvement and effort needed from your side – only for the initial briefing and regular progress reviews.
How Much Does It Cost to Build iOS Apps?
Some of the factors that influence the iOS app development cost are feature complexity, supporting app infrastructures like data storage organization and security protocols, ongoing maitenence like adjusting the app to the latest releases of firmware, and the chosen building approach. When coding the app yourself, you will only need a powerful computer ($1,000-$3,500), but the required time investments might be too excessive.
______
No-code app builders usually have monthly payments in the amount of $10-$100, with more expensive platforms charging up to $500-$1000. Freelancer and agency rates for outsourcing app development can differ depending on the chosen region. According to GoodFirms, North America has the highest average per-hour rates of $150, while coders in India can work for a moderate $25. A medium-complexity application would approximately take them 6-10 months to complete, costing somewhere around $120,000.
Step 6 – Test Your App
After the building stage is complete, you should have a fully functioning prototype on your hands – a .ipa archive with several folders – that has to go through extensive testing before it can be submitted for review. You will need to make sure all features are working as expected and the app is not experiencing crashes or problems even with the user count growth. Testing can also highlight design drawbacks and user experience gaps that you will want to improve before the release.
To estimate how well your app would work, you should cover several aspects: overall app functionalities (features, processing, and network speed), push notifications, natural gesture reactions, hardware menu interactions (GPS, ambient light sensor, Bluetooth, etc.), and real user condition simulations (to monitor battery consumption, memory utilization, and bringing the app to the background and back). To achieve a comprehensive performance overview, you will need to first simulate different conditions and then debug the app on a small segment of the target audience.
Test It Using Simulator in XCode
Among other tools, Xcode provides an iPhone simulator instrument to perform initial virtual testing. You can select one of the devices from the list in your Xcode project window and see how the app runs on a specific model family. At this point, you can also run tests on any iOS devices you own, assuming you have registered a development certificate with Apple to enable the simulator. For a more detailed guide on how to do that, check out the “Running Your App in the Simulator or on a Device” section of the official documentation.
While the simulator can highlight the major discrepancies and bugs in the app’s basic behavior, it has several limitations. As it runs on Mac and uses the computer’s resources, such as CPU, memory, and network connection, and the interaction is performed with a mouse and a pointer rather than fingers, the results won’t be as illustrative as on a real device. Xcode also doesn’t support several hardware features that iPhones have.
Test the App Internally
To run further testing, you need Apple’s software called TestFlight. Upload the beta version to App Store Connect, a platform to manage and submit new apps, and you will be able to invite your team members (up to a hundred of them) to test the app on their devices. Now’s the time to focus less on the bugs, as you’ve most likely caught most of them during the previous simulator stage, and evaluate the user experience, functionality, and cross-device performance of the app.
For this stage, you’ll need to obtain production App Store and Ad-Hoc certificates. The second one relates to closed internal testing on devices that you don’t have direct access to. For example, if you want some of your friends and family, or a small loyal customer group to test the app, but you are not ready to release it to the App Store, that would be the required permission. To add the desired devices, you’ll need to know their UDIDs, or unique identifiers, and generate distribution profiles for them in the identifier menu.
Test the App Externally
Finally, you can submit the app for external testing via TestFlight and invite up to 10,000 users by personally sending them a public link to download the app or sharing it on social media. Gradually add more users, collect their feedback in a convenient, statistically readable way, and make necessary adjustments to the UX and UI elements. Don’t forget to send the updated version of the app to customers that pointed out flaws to ensure you got their remarks right.
While testing may seem like a mundane and boring stage that is only holding your business back, external testing on a controlled audience is essential for the success of the released app. You are less likely to face any non-compliance issues with Apple’s review policies. A properly tested app won’t ruin the first impression by randomly crashing or not responding to a double-click. A stable, consistently functioning product will be easier to maintain and update in the future.
Step 7 – Publish Your App
Now all that’s left before submitting the app is gathering all the necessary information for listing it on the App Store. You will need to select a primary and a secondary category for your app to make it appear in relevant collections and search results. This is also the right moment to think of a payment plan – whether your app will be free, come on a subscription basis, or offer free limited functionality with a paid premium version.
Once you upload the data, keep monitoring the app’s status bar to see the current review stage. Apple states that most of the apps receive a verdict within 24 to 48 hours, but most developers report that their claim can be pending for 2 to 14 days. During the review, an employee from Apple checks for incomplete fields, broken links, placeholder content, usability, and some other factors to make sure that your business app is a finished product with real value that adheres to all internal regulations.
Create Your App Store Product Page

A product page is a presentation of your app that follows a certain structure and consists of standard elements: a name and icon, a short subtitle to summarize the essence of the app and a longer description of its features and purposes, a preview video, screenshots, and keywords for effective store search capabilities. More context on each of the required elements will be given below.
Choose the Right Name for Your App
As with any other product, the name carries a lot of importance: it has to be comprehensible, relevant, unique, and easy to remember. Luckily, since you are creating an app as an extension of your existing business, you won’t have a hard time coming up with one. Most brands use the same spelling and structure as in their official names. You might want to consider adding a purpose-related keyword for clarity or if there are several branches of your business covering completely different industries. That way, users will be able to easily recognize the company and the app they are looking for.


Don’t Forget Your App’s Icon
While the app name is quite important, it’s generally the icons that users notice when scrolling through every day when looking at their phones. Since these thumbnails are relatively small, avoid placing too many details, colors, or objects on them. Stick to your brand colors, use an adaptation of your business logo, or create something new that visually determines its main purpose.
App Subtitle
A subtitle appears right under the app name, next to the icon, on your App Store listing page. It presents a short summary of the features and functionalities that your app does to give new users more context. Try to make it attractive but stick to the facts: you can ask several customers to review the combination of the icon, name, and subtitle and whether, in their opinion, it gives an accurate representation of your business. The limitation for subtitle length is 30 characters.


App Previews and Screenshots
Previews are 30-second clips that highlight the user interface and features of your app. For users that prefer capturing information visually, this is your chance to make a more prominent first impression and demonstrate the app’s flow and usability. You can add up to three previews, but one or two is usually more than enough to walk your clients through the available functionalities. Unless you have the inspiration and extra budget for it, you can skip the preview and focus on creating screenshots.
Screenshots follow the preview in the photo gallery section of the app listing. You can add up to 10 pictures, but don’t try to use all the available space if your app essence can be explained with just four of them. Focus on conveying the right message: how can users manage their profiles, add appointments, browse the different products for sale, etc. You will have to provide separate files for different screen sizes. What’s interesting here is the images you submit don’t have to be actual screenshots – as long as they match the app appearance, so you can get creative. Here’s what Tinder does:

Description
All app listings have a description text field where you can provide a short summary of what your app offers and how it works. This is a good place to mention your business and explain what value the new iOS application gives to current and new customers. Only a short preview of the description will be displayed by default, with a “Read more” button next to it. So you’ll have to make sure the first couple of sentences are enticing and clearly demonstrate the app’s purpose and goal. Don’t include an excessive amount of search keywords in the description – there is a dedicated field for that.

Keywords
The App Store has a search bar that can work not only with app names but with keywords. In the case of existing businesses, they can act as organic traffic of new clients that do not go looking for your specific brand but simply require an app of a certain purpose. Try to make your keywords broad enough to appear in more searches, but remember that common words like “fitness” or “education” will likely leave a newcomer app at the bottom of the list, under all the established competitors.
Step 8 – Promote Your iPhone App
After the new app is released, your efforts shouldn’t stop: if you don’t raise awareness about it, all the resources and budget can go to waste. Getting to the top of App Store charts with a newly published app is highly unlikely, so you shouldn’t rely on Apple’s internal algorithms to do the job for you. There are several marketing strategies for app promotion that you could try, from offering app-specific discounts and using social media and PR channels for paid promotions and collaborations.
Share with Your Online and Offline Audience
If you’ve been following the steps outlined above, chances are, a certain part of your current audience already knew about your plans to develop an app: they might have seen the research surveys or even became one of the few select beta testers. As for the other segment of your customers, you’ll need to find an appropriate channel for your business to share the news.
Try to create the release-related content engaging and fun rather than promotional. Show a part of the development process, hold contests for best feature suggestions or improvement ideas, and make video tutorials for iPhone users. Don’t limit yourself to online activities just because the app is a digital product – your clients most likely take their phones with them anywhere they go, and a reveal party at your location can work just as well in terms of bringing in new users.
Create an Offer
In the first few months after the release, your goal should be to extend the app coverage over your client base. To further encourage people to download and interact with the app, you can introduce special offers or discounts that are only available to clients who book an appointment or purchase a product using the new mobile features. Again, spread the word about the offers both through digital channels like social media / website / blog / newsletter and offline marketing materials: in-person events and business visits, flyers, cards, etc.
Ask for App Store Reviews
A solid rating and words of praise on the App Store listing from your current clients can encourage new users to download the app as well. The rating can also affect your standing in the primary and secondary categories, which can help you attract more customers via the search results. Detailed reviews that give an overview of app usability and performance give more value to potential users, so ask your customers to be more specific and possibly encourage leaving reviews with a compliment or a discount.
Attract Press Attention
Digital advertising in industry blogs or magazines is a higher-budget option for promoting your app, but it can have a bigger goal than just raising awareness. If you’ve been wanting to purchase paid placements to expand the reach for your business, turning the acquired customers into new app users comes as a nice bonus. To save money, you can try searching for collaboration offers: you’ll promote someone else’s brand, and they will direct people towards yours.
For a press release, you might want to highlight the app creation journey. It’s more about a compelling story that will resonate with people than direct promotion. However, don’t forget to include useful facts and features of your app and provide download links. Whichever approach you choose, make sure you’re monitoring its performance with the help of tracking and statistics: that way, you’ll easily determine what works and what doesn’t for your business and the new app.
Conclusion
Building an app is not an easy process as it requires a lot of preliminary research, the ability to quickly adapt to the changes in course, the willingness to stay in contact with your audience, and sometimes put their needs and desires ahead of your own business goals. Once you settle on the idea to make an iOS app and put together its concept, your to-do list for the next few months will be bursting with development meetings, strategy planning sessions, countless decisions on interface design, and time-consuming guideline adherence attempts.
However, despite all the nuances, app making is a rewarding undertaking, as it allows your business to deliver more value to customers and opens up doors for new clients, new monetization opportunities, increased brand awareness, and, consequently, higher sales. An iPhone app, specifically, adds more credibility to your overall image, as it is closely associated with luxury and convenience – something you’ll want for your business as well.